Procurement Workspace
Video transcript
00:04 — Procurement Workspace
The Procurement Workspace is an AI sourcing notebook. Search distributor catalogs for real, in-stock parts, and curate a shortlist — here, motor controllers for an electric drivetrain. Every candidate carries its specifications, pricing and availability, and moves through a clear lifecycle — exploring, shortlisted, contacted, quoted — with a managed request-for-quote thread per supplier. Compare the finalists side by side, then push the winner straight into your bill of materials. Sourcing decisions, documented and connected to the rest of your design.
Search → curate → managed RFQ → compare → push to BOM.
What it's for
A working procurement notebook — one workspace per purchase decision, holding a list of candidate parts. A three-tier search finds candidates (electronics catalog via Nexar, manual entry, or opt-in AI web lookup, each marked verified or unverified), you send managed RFQs, compare quotes in an AI matrix, and push the winner to the BOM.
When to use it
Use the Procurement Workspace when you’re actively sourcing parts after a BOM exists and you need to find candidates, obtain supplier quotes, compare options, and select a part for purchase.
How it works
-
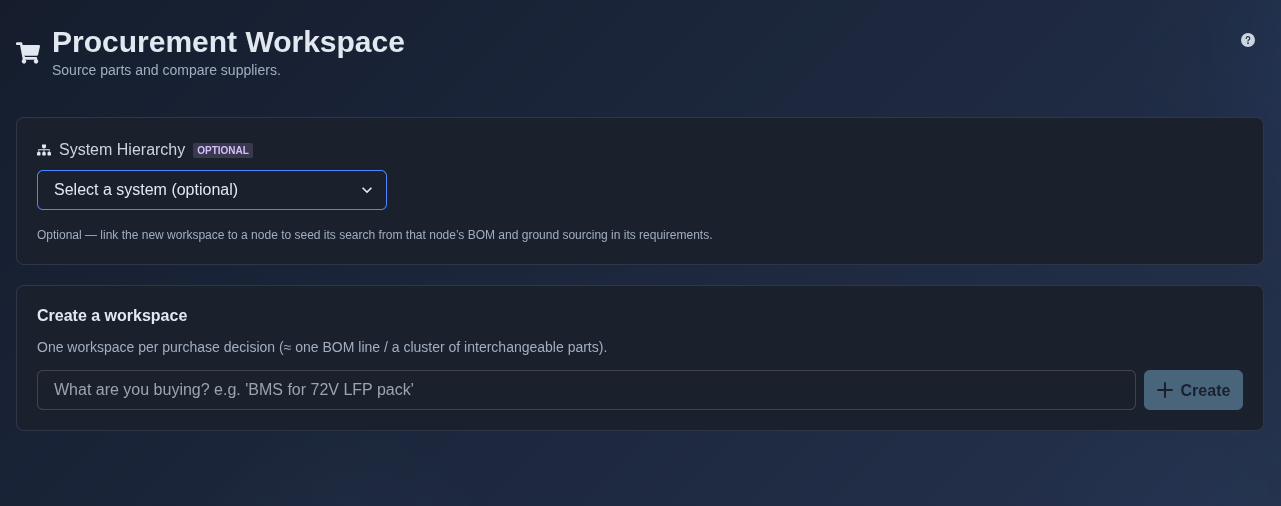
Create a procurement workspace. → Optionally select a system from the “System Hierarchy” to link the workspace to a node and use its BOM and requirements for sourcing. Enter what you are buying in the workspace field and click “Create” to create the procurement workspace.
▶ Initial state▼ Initial state
-
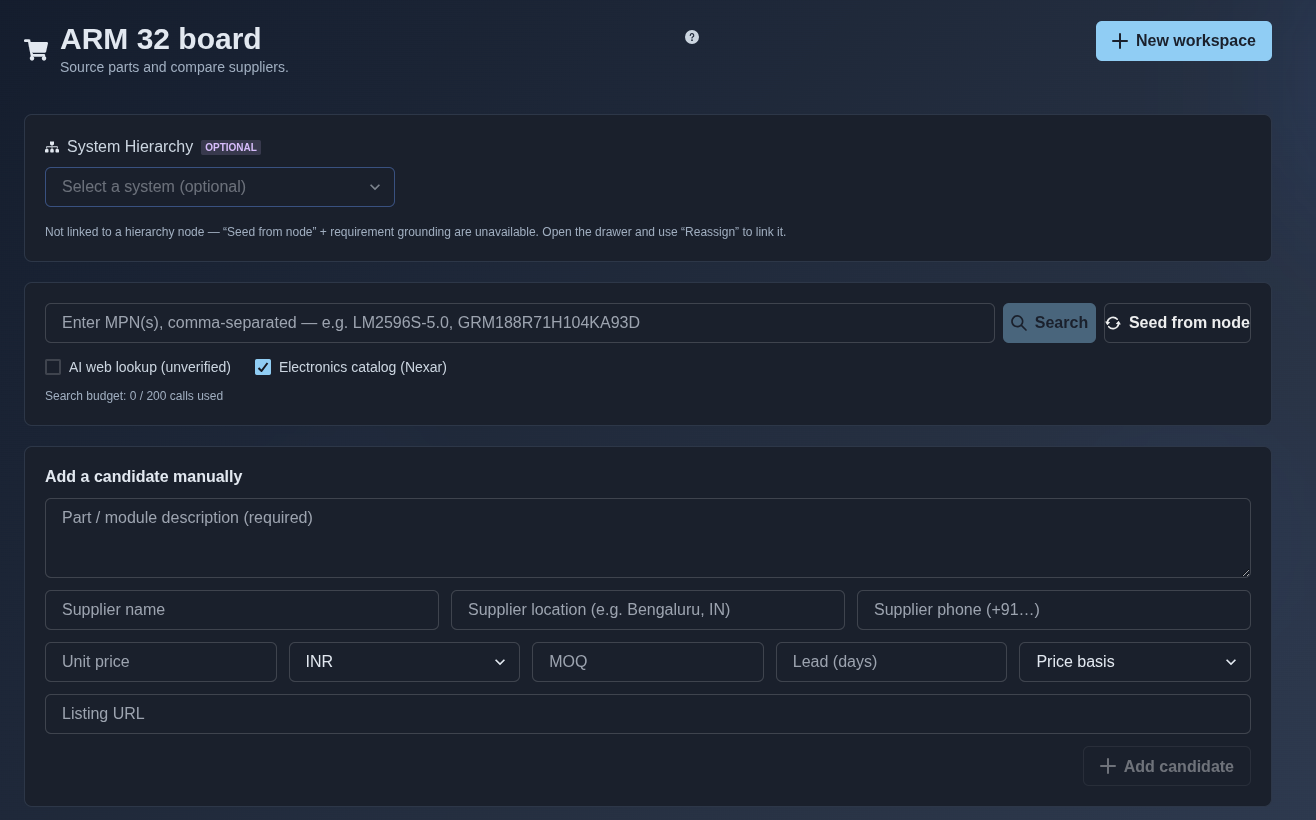
Create the procurement workspace. → Enter the required purchase description and click “Create.” The system creates the procurement workspace and opens the workspace where you can search for parts, seed parts from the linked system node, and add candidates manually.
▶ Create procurement workspace▼ Create procurement workspace
-
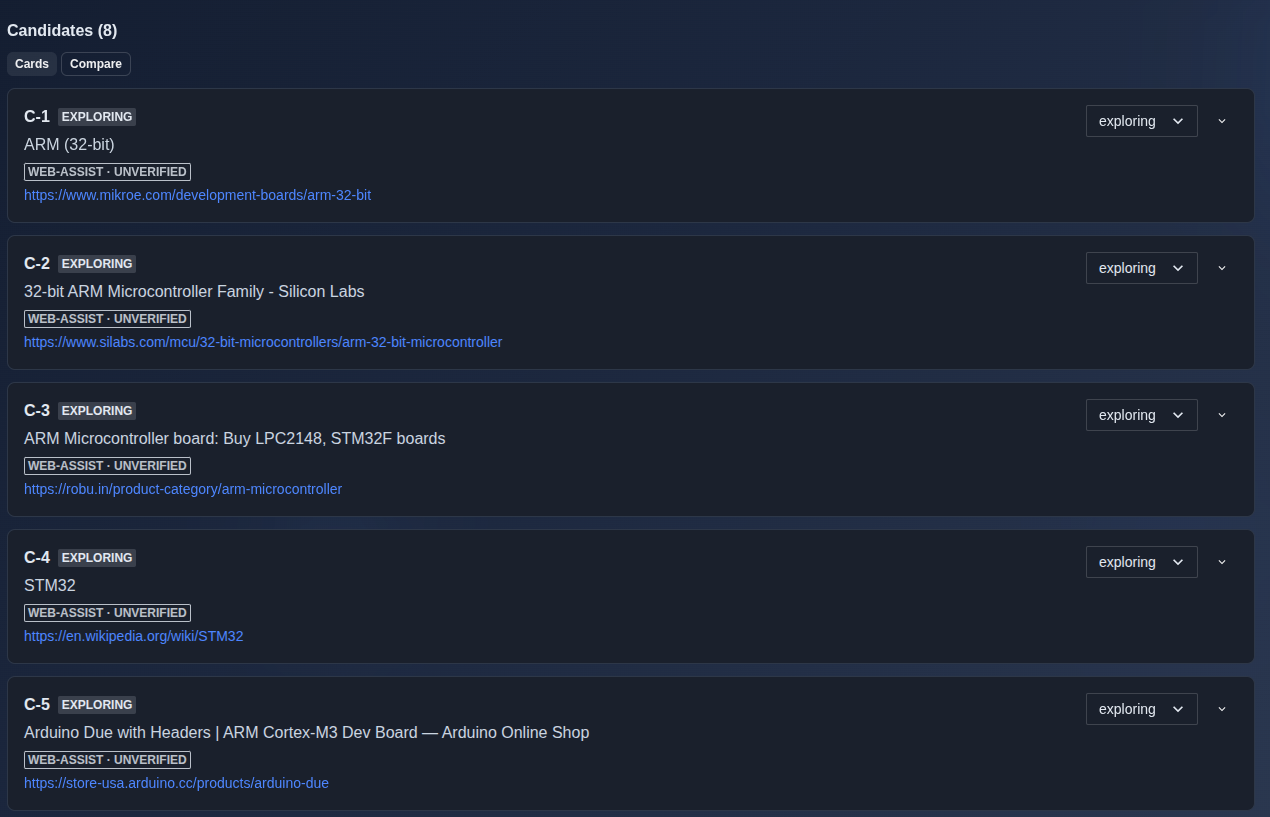
Search for parts or suppliers. → Enter the required part or module description in the search field and click “Search.” The system searches the selected sources and displays the matching candidates in the “Cards” tab, with each card showing the candidate description, source link, and sourcing status.
▶ Search for parts or suppliers▼ Search for parts or suppliers
-
Move a candidate through the sourcing funnel. → Use the status dropdown on a candidate card in the “Cards” tab to move the candidate through the available stages: “exploring,” “shortlisted,” “contacted,” “quoted,” “rejected,” “selected,” and “purchased.”
▶ Move a candidate through the sourcing funnel▼ Move a candidate through the sourcing funnel

-
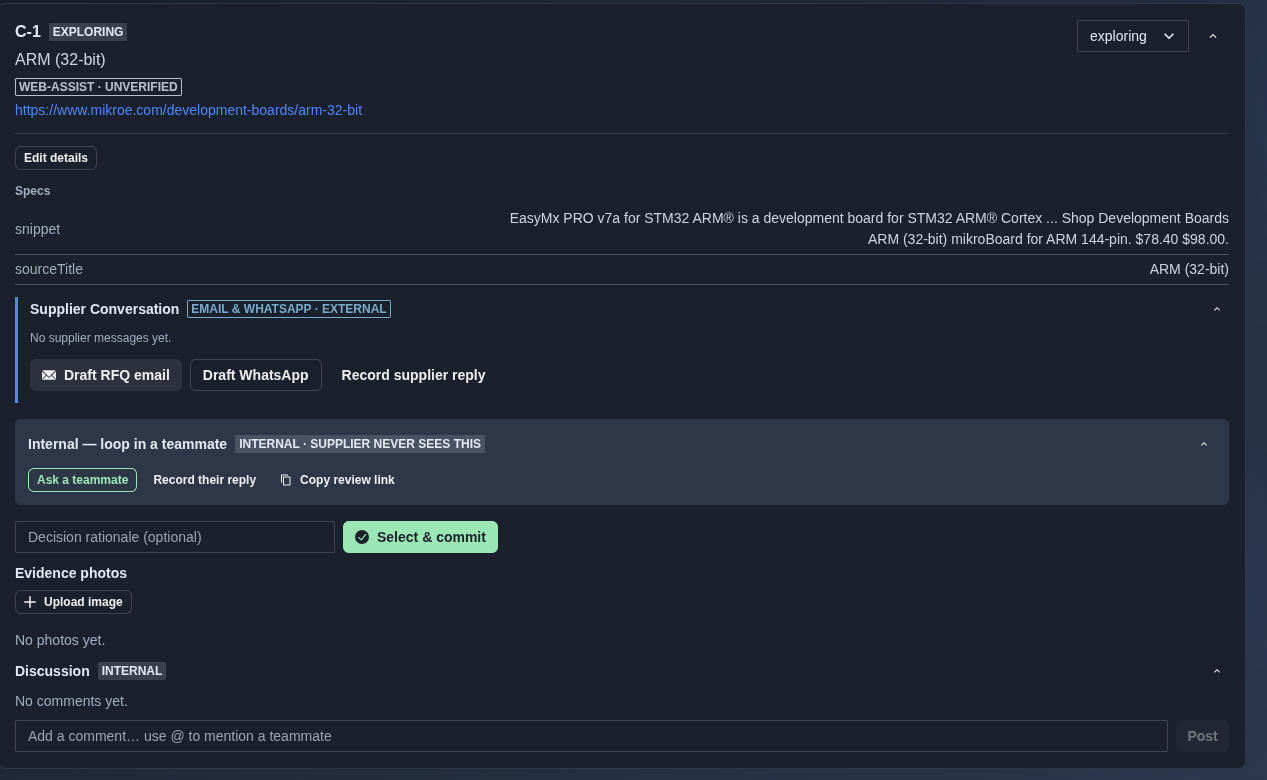
Review and manage a candidate. → Expand a candidate card to review its specifications, including the snippet and source title. Use “Edit details” to update the candidate information, “Draft RFQ email” or “Draft WhatsApp” to prepare a supplier message, and “Record supplier reply” to record the supplier response. Enter an optional decision rationale, upload evidence photos if required, and click “Select & commit” to record the sourcing decision. Use the “Ask a teammate” or “Record their reply” options for internal collaboration, and add comments in the “Discussion” section and click “Post” to share them with the team.
▶ Review and manage a candidate▼ Review and manage a candidate
-
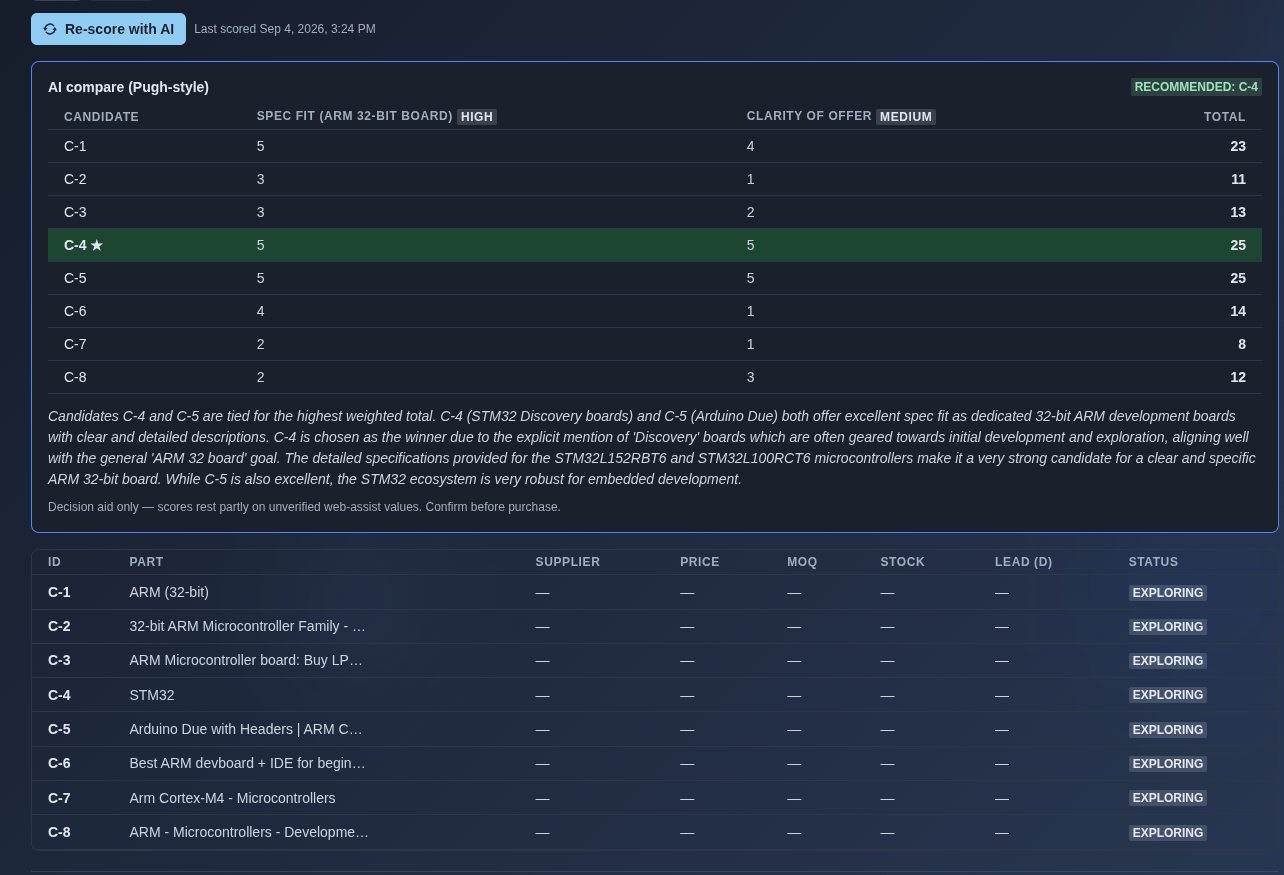
Review the AI comparison of candidates. → Review the “AI compare (Pugh-style)” results, including the candidates, specification fit, clarity of offer, and total scores. Review the AI recommendation and comparison summary to identify the highest-ranked candidate, then review the candidate table showing ID, part, supplier, price, MOQ, stock, lead time, and status. Use “Re-score with AI” to run the comparison again when needed.
▶ Review the AI comparison of candidates▼ Review the AI comparison of candidates
-
Seed parts from the system node. → Click “Seed from node” to seed parts from the linked hierarchy node’s BOM. The system searches the available sourcing sources for the BOM part numbers and displays the resulting candidate counts and lookup information, including matches from Nexar, DigiKey, Mouser, Farnell, and other sources.
▶ Seed parts from the system node▼ Seed parts from the system node

-
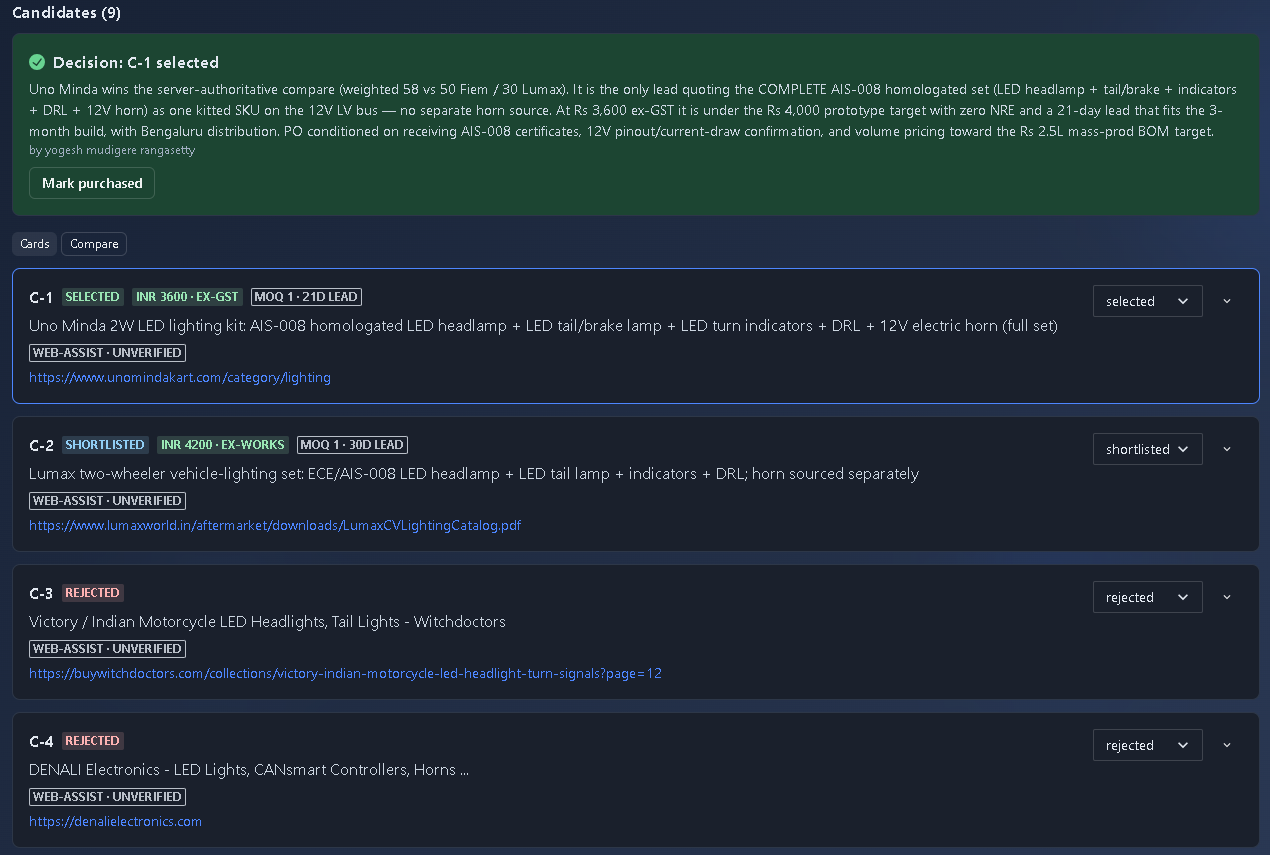
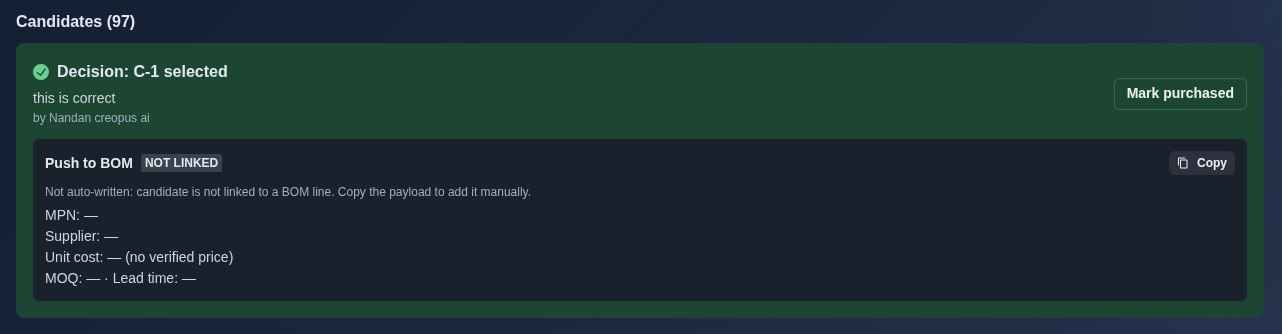
Review the selected candidate and push it to the BOM. → Review the selected candidate and its decision details, including the selected candidate ID, decision reason, and “Push to BOM” information such as MPN, supplier, unit cost, MOQ, and lead time. Use “Copy” to copy the BOM payload for manual addition when the candidate is not linked to a BOM line, or click “Mark purchased” to record the purchase.
▶ Review the selected candidate and push it to the BOM▼ Review the selected candidate and push it to the BOM
-
Export the procurement workspace. → Click “Export” and select the required output format: “PDF” for a formatted PDF with a cover page and page numbers, “CSV Spreadsheet” for Excel or Google Sheets, or “JSON Data” for structured data.
▶ Export the procurement workspace▼ Export the procurement workspace

Mechanics
- System-linked procurement workspace with optional BOM and requirement grounding
- Part and supplier search with catalog, web-assist, and manual sourcing
- Candidate cards with source information and sourcing status
- Sourcing funnel: Exploring · Shortlisted · Contacted · Quoted · Rejected · Selected · Purchased
- Candidate details with supplier communication and internal discussion
- AI Compare matrix for candidate evaluation and recommendation
- Candidate selection with decision rationale and evidence photos
- BOM seeding from a linked system node
- Selected candidate BOM payload and purchase tracking
- Export: PDF · CSV Spreadsheet · JSON Data